
A
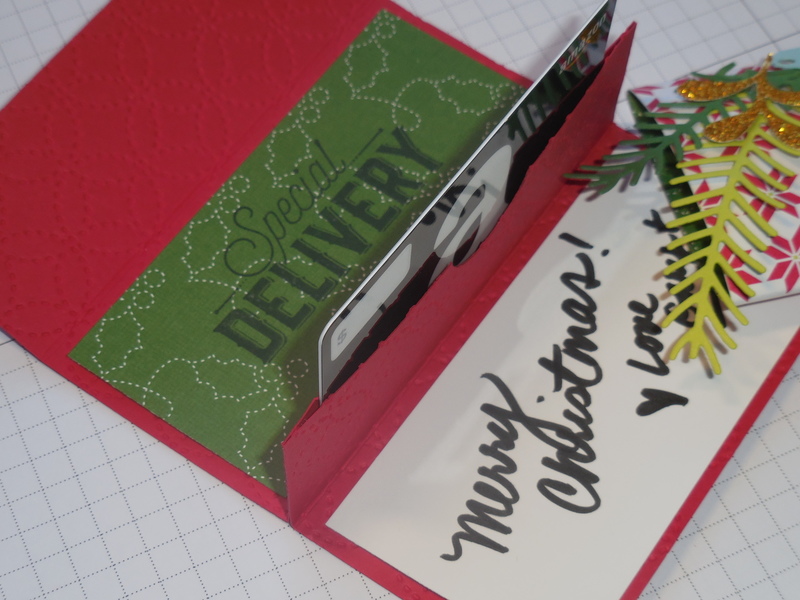
nother fun gift card holder in our series! When you open it, the gift card pops up and takes center stage! Quick, easy and fun to make, these are great for the holidays when time is short, but, your list is long!
Edit: Visit my NEW WEBSITE StampinSavvy.com
Project Recipe

Cut 2 pieces of cardstock or DSP
(1) 4-1/4" x 5"
Score @ 1-1/4" and 3-1/2" on long side
(2) 4-1/4" x 3-1/2"
Score at 1-1/4" on short side
OPTIONAL: Emboss or stamp pattern on one side of both pieces

From both pieces, fold back the score lines that are 1-1/4" from edge. (If you have embossed them, make sure the same embossed/debossed sides are up!) Apply Tear & Tape adhesive to edges on one piece. Align them together, remove paper and "kiss" them to form the pocket for the gift card.

Create a notch in gift card holder using a 1" circle punch.

Round the corners from the larger piece (that still has a score line).

Cut two pieces DSP or cardstock 4" x 2".
Stamp sentiment of choice and adhere to inside middle and bottom.

Cut a 1-1/2" x 6" band from DSP or cardstock. This will go around the wallet/clutch and keep the gift card from falling through!
Fold the last score line on the wallet/clutch in towards the gift card holder and fold it closed.
Starting at flap mark, wrap around wallet/clutch and secure with Tear & Tape adhesive.

Decorate the band with embellishments of choice and top with a ribbon and tag, if desired.
That's it: insert a gift card, sign and give to a loved one!
Share some love with a Paper Hug today! :)