
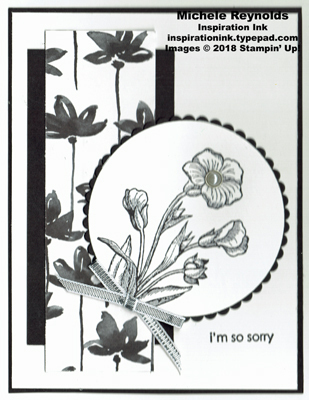
E legant black and white card using Stampin' Up! products.
Project Recipe
Cut cardstock and designer paper pieces to the following sizes using a Stampin' Trimmer:
- card from Whisper White Thick Cardstock at 5-1/2" x 8-1/2" and scored at 4-1/4"
- 4" x 5-1/4" from Basic Black Cardstock
- 3-3/4" x 5" from Whisper White Cardstock
- 2" x 4" from Basic Black Cardstock
- 1-1/2" x 4-5/8" of black flowers on straight stems on white background design from Petal Passion Designer Series Paper
- 3-1/4" square from Basic Black Cardstock
- 3-1/2" square from Whisper White Cardstock
Pick out the sentiment of choice from the Teeny Tiny Wishes Set. Just remember that it can't be too long or it won't fit. Ink it up with the Basic Black Archival Ink Pad. Stamp it in the lower right corner of the large white rectangle about 5/8" up from the bottom.
Adhere the strip of Petal Passion Designer Paper to the center of the strip of black cardstock.
Adhere the matted designer paper to the left side of the stamped white rectangle.
Adhere the stamped white rectangle to the center of the black rectangle and then to the front of the Whisper White Thick card.
Place the white square of cardstock on some Grid Paper to protect your work surface.
Mount the large flower, buds, stems, and leaves image from the Butterfly Basics Set on Block I. Ink it up with the Basic Black Archival Ink Pad. Stamp it on the white square so you get the top of the image.
Pick out the circle framelit from the Layering Circles Framelits that cuts out a 2-5/8" circle. Place the stamped white square on the Cutting Pad on top of the Magnetic Platform on the Big Shot. Place the circle framelit on top so it is centered over the top of the image. Place another Cutting Pad on top and run through the Big Shot.
Pick out the scalloped circle framelit from the Layering Circles Framelits that cuts out a 2-13/16" scalloped circle. Place the Basic Black square on the Cutting Pad on top of the Platform on the Big Shot. Place the scalloped circle framelit on top. Place another Cutting Pad on top and run through the Big Shot.
Adhere the white circle to the center of the scalloped black circle.
Adhere the matted circles to the front of the card so they are just above the sentiment and the left side of the circles overlaps the right side of the designer paper and black cardstock strips. Turn the circles so the flowers are leaning to the right.
Cut a 10" piece of Silver 1/8" Ribbon.
Tie a small bow in the center of the ribbon. Trim the ends.
Use a Mini Glue Dot to adhere the ribbon to the front of the card so it covers the bottom of the stamped flower stems at a slight angle.
Pick out a small Metal Rimmed Pearl. Peel off the protective backing and adhere it to the center of the large flower.