
T
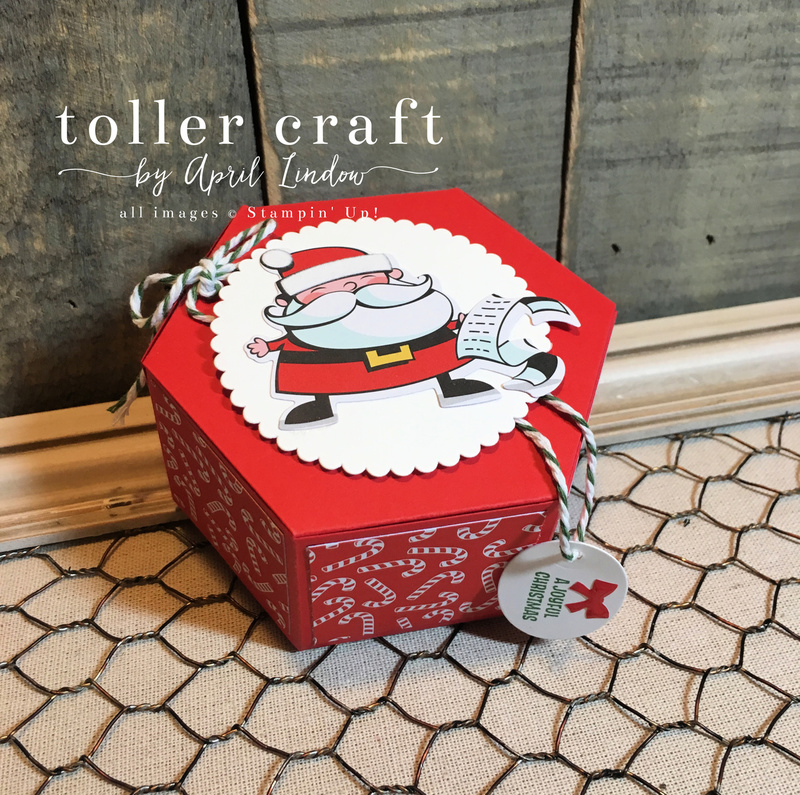
hese cute Santas from the Santa's Signpost stamp set and the coordinating Designer Series Paper make the window box a perfect package for a stocking stuffer. I used Poppy Parade card stock and the Santa's Workshop Specialty Designer Series Paper. To make these fast, I used the Santa's Signpost Framelits Dies and cut out the Santa from the DSP. Unfortunately the DSP and the framelits are no longer available, but you can stamp the image from the Signs of Santa stamp set and cut it out by hand and color him in with the blends using Dark Real Red, Dark Daffodil Delight and Ivory. I love how versatile these Window Box Thinlits are. I am going to use them for Valentine's Day, too!
Thanks for stopping by!
Project Recipe
Use a 12" x 12" piece of Poppy Parade card stock and cut it into (2) 6" x 6" pieces for the top and bottom of your box.
Cut 6 pieces of patterned paper to 1 5/8" x 1 5/8". I used the Santa's Workshop, but any Christmas designer series paper will work.
Cut a 16" long piece of Garden Green Bakers Twine

Cut a piece of 3" x 6" whisper white card stock for your scalloped circle, tag, and Santa if you don't have the Santa's workshop DSP to cut it from.
Stamp the Santa from Signs of Santa with the Momento Tuxedo Black ink and color it in with the Stampin' Blends.
Stamp the sentiment A Joyful Christmas on the piece of Whisper White card stock leaving room for the 2 1/2" scalloped circle.
Run the window frame thinlit through the Big Shot on both pieces of Poppy Parade card stock.
Cut out the scalloped circle and the tag from the Whisper White piece of card stock.
Hand cut the santa and adhere him to the scalloped circle.

Fold along every score line of each of the window box pieces.
On one of them you will take a tiny bit of multipurpose adhesive and adhere the tabs from the bottom to the two sides. This is now the bottom of your box.
Trim the two tabs off from the sides of the piece that is now the top of the box.
On the top piece, apply a small amount of adhesive to the two tabs that will attach to the bottom of your box. Hold them to the bottom piece for the adhesive to set. Apply adhesive to the remaining tabs and hold the pieces together.
Make sure that you do not adhere the top lid of the box closed!!
Now that your box is complete, you are ready to adhere the DSP to each panel of the box.
Loop the bakers twine through the tag opening and tie a box on the end.
Apply Stampin' Dimensionals to the bottom of the scalloped circle.
Drape this over the lid and place the scalloped circle on top.